Painting our cabinets proved to be a tricky job. Isn’t that always the way with DIY projects? That said, each individual step was easy to tackle. It was not knowing how to start that was intimidating. Sure, you sand first, then you paint. I’ve got that. But we were doing steps I had never tried before, like using a TSP cleaner to further smooth out the cabinet doors between sanding and painting. I had never popped trim off of doors or wrenched reluctant screws off of cabinet bases either.
I’ve said it before, and I’ll say it again. Young House Love’s tutorial was my cheat sheet. I looked at it at least a few dozen times as I finished each step. We did almost everything the way they did, with a few small exceptions that aren’t significant. I thought the TSP cleaner was overkill after our doors were nicely sanded and looked ready to go, but I wholeheartedly believe in that step now. I could see the last bits of stain coming off as I cleaned the cleaner away. (Cleaning cleaner away? It happens.)
So what did we get for all of this work and approximately $100 of our own money? [Just as a note, it cost about $250 for us to complete this project from start to finish, including sandpaper, chemicals, primer, paint, hinges, handles, and sweat. We happen to have awesome friends and family who gave us gift cards that got us through the first $150 for free.] Well, we got a crisp, clean kitchen that looks much more appropriate in the current decade.
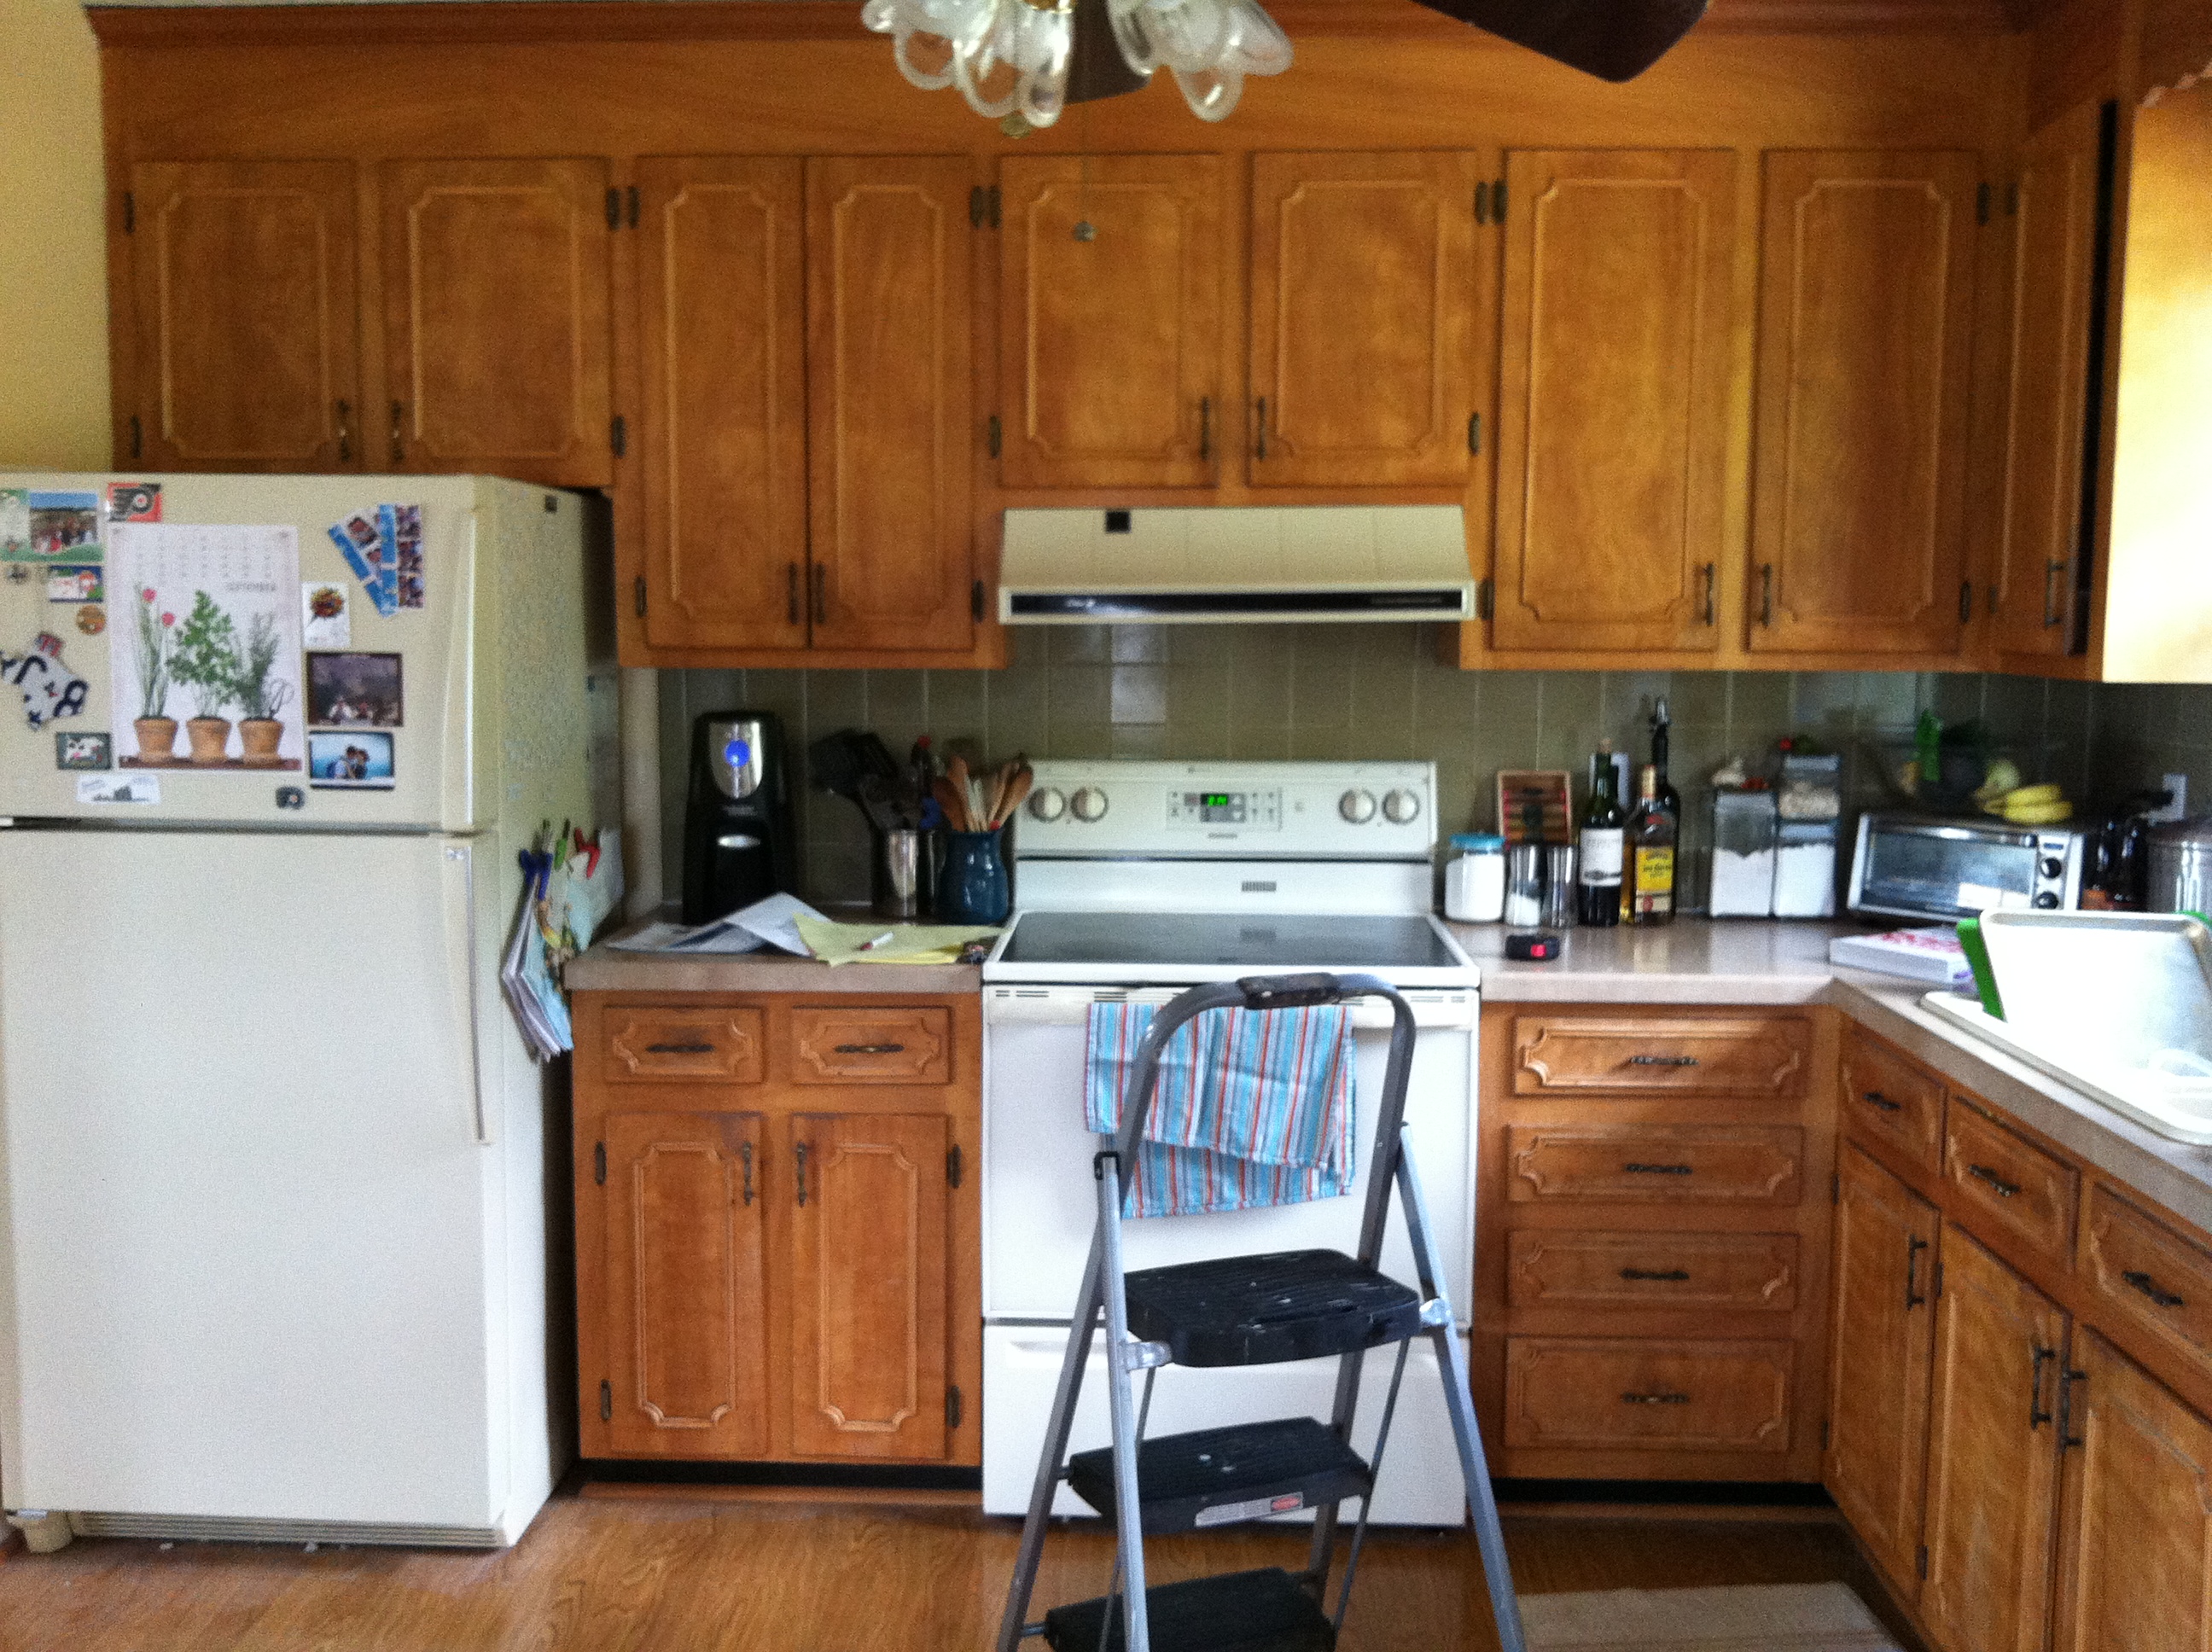
See, there once was 70’s:
And now, with three coats of paint on the back and four coats on the front of each door, I proudly present:

Ta da!
This isn’t the official reveal, since we still have things to do. But the cabinets are done, and I’m very happy about that. I couldn’t handle painting one more coat of white on top of white.
What’s left?
-
Cabinets for the new island
-
Countertops for the island and existing countertop areas
-
A sink and faucet to go with the countertops (and some new light fixtures that have yet to be selected)
-
Paintin’ walls
-
Paintin’ other stuff (unsure what’s going to happen to the fridge and vent hood over the stove, but there might be paint involved with those and the small air vent below the sink)
-
Finishing out the beams and such where the walls used to be, which Scott is currently tackling like a champ
-
New (old–reclaimed) hardwood floors for our main floor
- Jubilation!
Fortunately for us, every step involves some sort of jubilation. Unfortunately for us, we live in the real world and have bills to pay. So there will be some waiting between those projects. It happens. I actually don’t mind that much, because it allows for some recovery time and a chance to enjoy what we just finished doing. And that’s what I’m going to do tonight. I’m going to enjoy cooking in a nice, fresh kitchen.

The cabinets look beeeeeautiful!
Thanks, Marj! You were really helpful in the putting things back together process.